
This guide helps your team get more value from TurboHelp's AI and Automation tools. Use it to understand the feature, configure it correctly, and know what to check before relying on it in your daily support workflow.
At a Glance
Use automation to remove repetitive work while keeping humans available for complex issues.
Start with focused rules or flows, test them with real examples, and expand gradually.
Review AI handoffs, tool results, and knowledge quality so automation stays helpful.
Extend the power of your TurboHelp AI Agent by connecting it to your internal or third-party services with Tools. Tools allow your AI Agent to go beyond answering questions from its knowledge base by performing actions and retrieving live data from external APIs.
With Tools, your agent can:
Fetch a customer's order status from your e-commerce platform.
Retrieve user-specific information from your CRM.
Check appointment availability in a booking system.
And much more, by connecting to any service with an API.
This guide will walk you through creating and configuring a tool for your AI Agent.
Managing Your Tools
You can find all your tools by navigating to AI Agent > Tools page from agent dashboard or admin area.
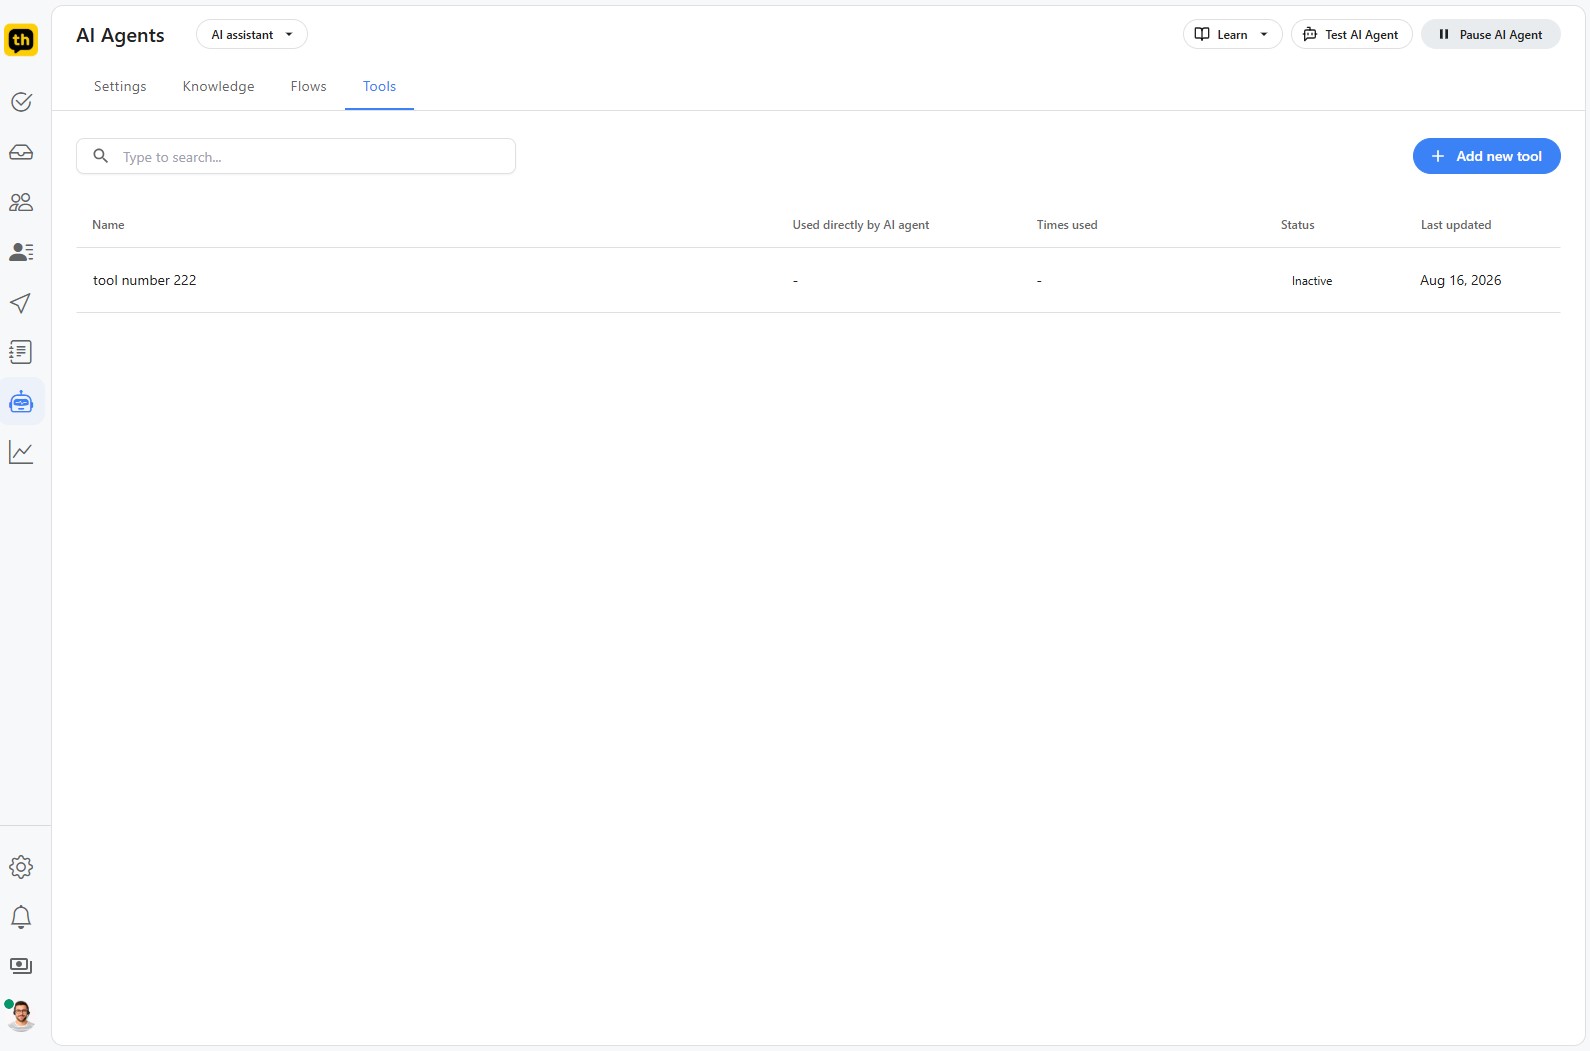
On this page, you can:
View Existing Tools: See a list of all created tools with their name, usage statistics, status, and last update date.
Activate or Deactivate Tools: From the Status column, you can activate or deactivate any tool. A deactivated tool will not be used by the AI Agent autonomously and will not be available for use in Flows.
Add New Tool: Click the + Add new tool button to begin creating a new integration.
Manage Agent Status: Use the Enable AI Agent toggle in the top-right to activate or deactivate the agent across your platform.
Creating a New Tool
When you click + Add new tool, you'll be taken to the tool configuration screen, which is divided into four main sections: General, API connection, Test response, and Attribute mapping.
Tip: Configuration section will be disabled if previous section has errors or unsaved changes. Fix any errors, and click Save and continue button to move to next section.
1. General Settings
This section defines the tool's purpose and how the AI Agent will decide to use it.
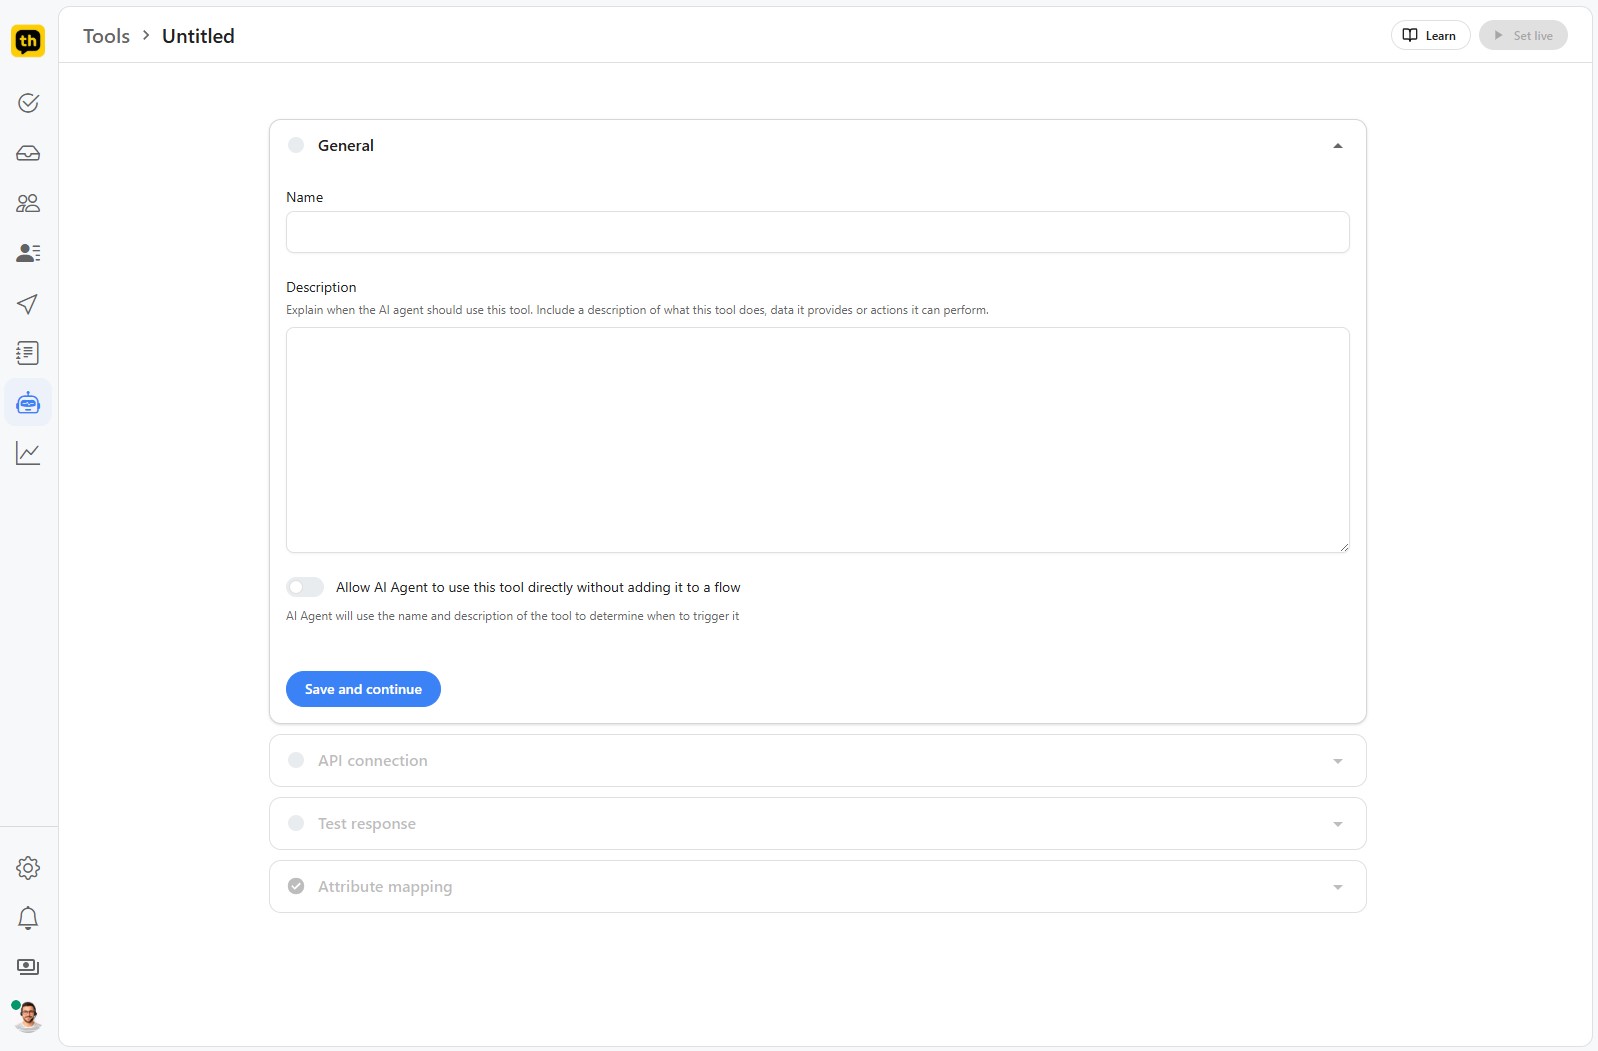
Name: Give your tool a clear, descriptive name. For example, "Fetch user orders".
Description: If you want this tool to be used outside of flows, clearly explain when the agent should use this tool, what it does, and what kind of data it retrieves. The AI uses this description to match the user's intent to the tool's capability.
Allow AI Agent to use this tool directly: This toggle controls how the tool is triggered.
Enabled: The AI Agent can intelligently decide to use this tool on its own during a conversation if the user's request matches the tool's name and description.
Disabled: The tool can only be activated when it is explicitly added as a step within a flow.
2. API Connection
Here, you will configure the technical details for connecting to your external API.

Collect data inputs (optional): Specify any information the AI Agent needs to collect from the user before it can use the tool. For example, to fetch an order, you might need an
order_idorcustomer_email. The agent will ask the user for this data if it's not already known.API request:
Method: Select the appropriate HTTP method for your request (e.g.,
GET,POST,PUTDELETE).HTTPS URL: Enter the full API endpoint URL. You can insert variables from collected inputs or user attributes here (e.g.,
https://api.my-shop.com/orders?customer_id={{user.id}}).HTTP Headers: Add any necessary headers, such as
Content-Typeor anAuthorizationheader for API keys.Request body: If method is set to POST or PUT, you can enter JSON or plain text body for the request.
Tip: You can use any attributes available for the current user or flow, as well as data collected by AI agent as variables in URL, headers or body.
3. Test Response
This section allows you to verify your API connection and provide sample data for setting up the final step.

You have two options:
Live response: After configuring the API connection, click the Test request button to make a real call to your endpoint. The response from your API will be displayed here. This is the best way to ensure your connection is working correctly.
Example response: If your API is not yet live, or you want to configure the tool without making a live call, you can paste a sample JSON response into the editor. This allows you to complete the attribute mapping step.
4. Attribute Mapping
In this final step, you can map data from the API response to specific TurboHelp attributes. This is useful when the same tool is reused in multiple flows, this way you can use attributes mapped here in flows directly, without having to manually map them in each flow.
Tip: Mapping is optional and only used in flows. The AI Agent can understand and use all data returned from the API in its conversational responses automatically, even without mapping.
The system automatically parses the JSON response from the previous step and lists the available data fields. For each field, you can see:
Data: The path to the data point in the JSON structure. The
[*]syntax indicates the tool is processing an array of items.Example value: A sample value from the live or example response.
Format: The detected data type (e.g., String, Number, Boolean, Date).
Attribute mapping: An optional dropdown where you can select a TurboHelp attribute to store this piece of data.
Once you have configured all the sections, click Save.
Important: The tool will be set to inactive by default, which will prevent it from being selectable in flows or being used by AI agent. Make sure to set it to active from top right corner on this page.
Best Practices
Give the AI agent narrow, high-quality knowledge before broadening its scope.
Always define a clean escalation path to a human agent.
Use test conversations to confirm the automation does what customers expect, not just what the rule says.