
This guide helps your team get more value from TurboHelp's Settings tools. Use it to understand the feature, configure it correctly, and know what to check before relying on it in your daily support workflow.
At a Glance
Use settings to shape TurboHelp around your team's support process, brand, and security needs.
Document meaningful changes so admins can understand why each option was configured.
Test customer-facing changes in a staging or low-risk environment when possible.
In TurboHelp, roles and permissions are a powerful way to control what your users and agents can do. This helps you keep your helpdesk organized and secure.
What are Roles and Permissions?
Roles are like job titles. You can create roles for different types of users, like "Customers," "Agents," or "Admins." Any permissions a role have will be inherited by all users belonging to that role.
Permissions are specific actions that users in a role are allowed to do. For example, the "Agents" role might have permission to reply to tickets, while the "Customers" role does not.
You can create custom roles and assign a specific set of permissions to each role. This allows you to tailor the user experience to the specific needs of your organization.
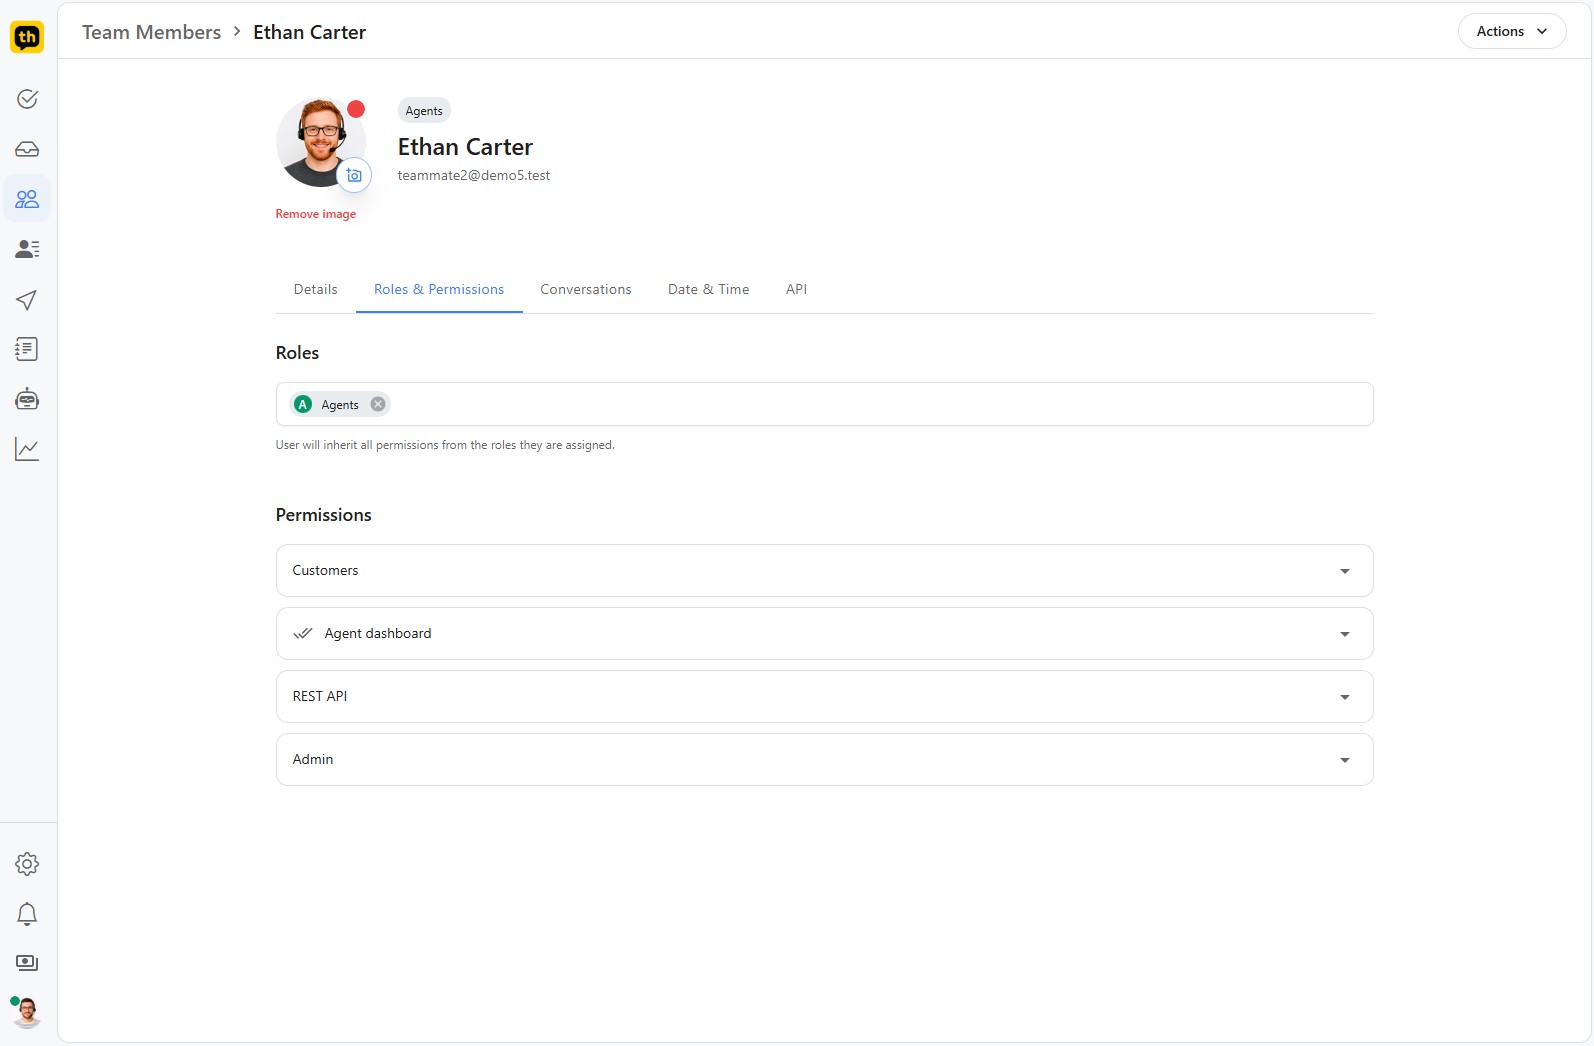
Assigning permissions
You can assign permissions to agents and customers from Team and Customers pages in both admin area as well as agent dashboard. Simply select a user and you should see a Roles & Permissions tab in agent or user profile page.
Managing Roles
You can manage all roles from the admin area. Navigate to Roles from the left-hand sidebar to see a list of all existing roles, separated into Customers and Agents tabs.
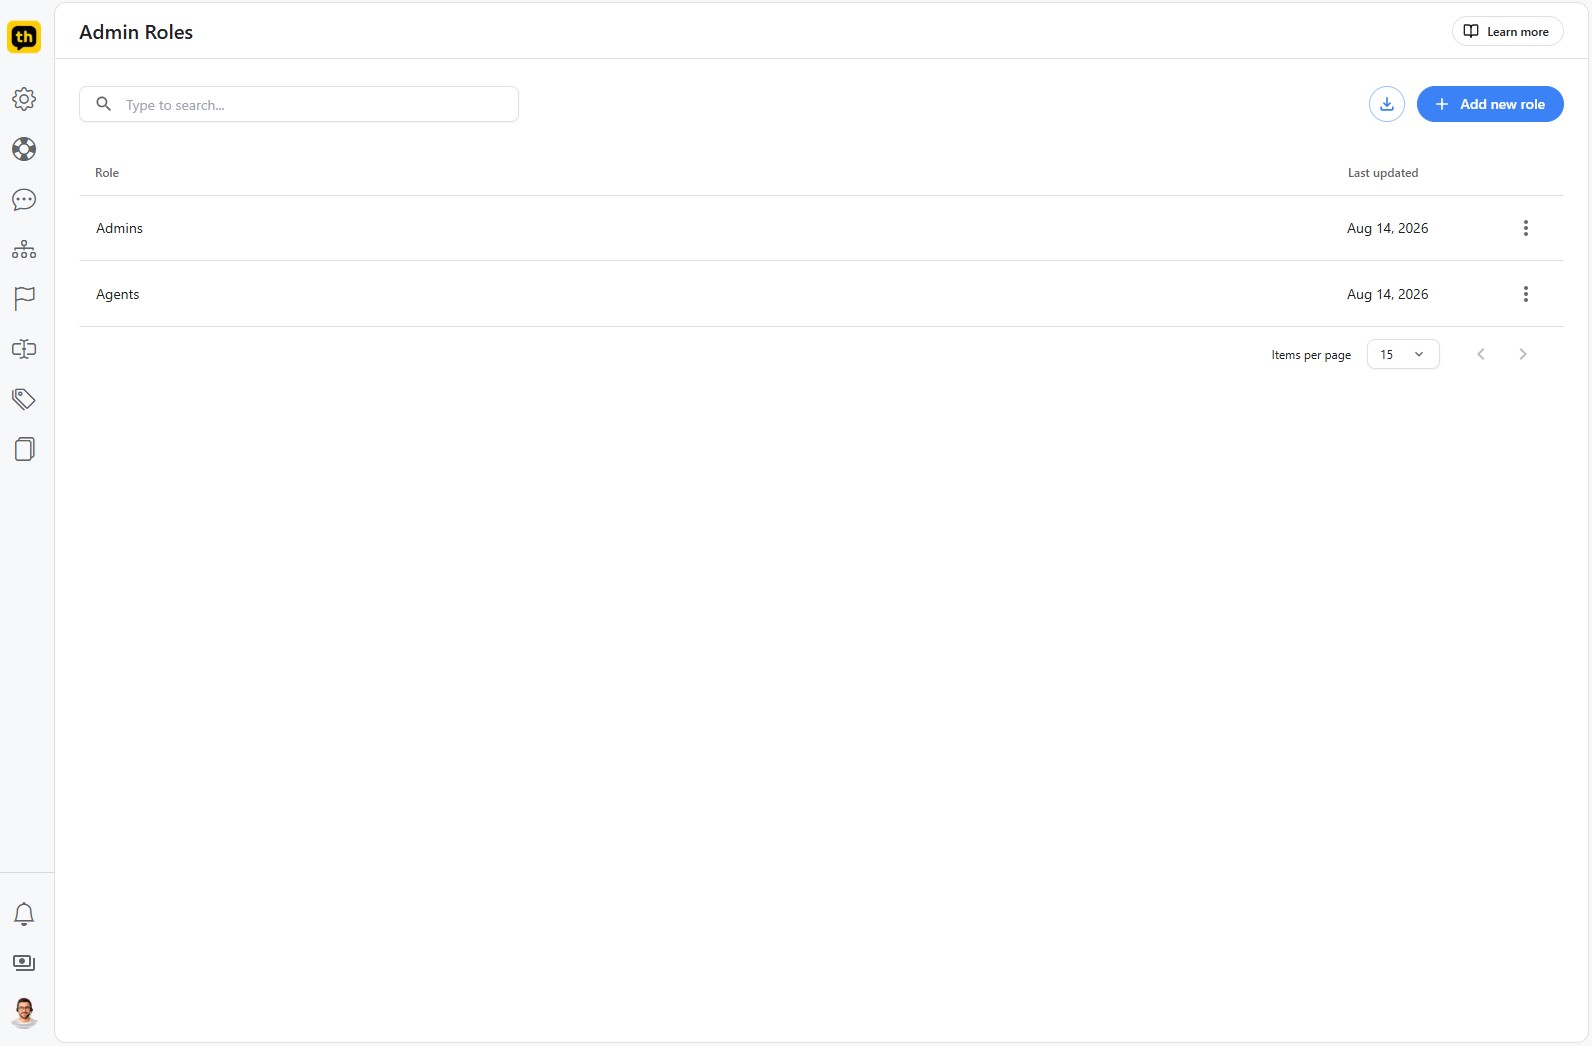
From this page, you can create a new role by clicking the Add new role button. To edit an existing role, simply click on its name in the list. This will take you to its configuration page where you can modify its name and permissions under the Settings tab.
The Users tab on a role's configuration page shows all users currently assigned to that role. You can add more users by clicking the Assign user button and searching for the user you wish to add.

Default Roles
TurboHelp comes with four default roles:
Customers: This is the default role for registered users. They can view articles, create conversations, and upload files.
Guests: This role is for unregistered users. They can view articles and upload files (in live chat or new ticket page)
Agents: This role is for your support staff. They can access agent dashboard/inbox and manage conversations, articles, customers, canned replies as well as view reports.
Admins: This role is for administrators. They have full access to the agent dashboard as well as administration area.
Available Permissions
Here is a list of all available permissions in TurboHelp, grouped by category:
Customers
View help center: Allow viewing of all help center articles and categories.
Start conversations: Allow creating new conversations via email, ticket portal, widget or other channels.
Upload files: Allow uploading attachments to conversations.
Agent dashboard
Manage conversations: Allow full access to conversations in agent dashboard.
Manage help center: Allow editing of all help center articles and categories.
Manage customers: Allow customer management.
Manage canned replies: Allow canned reply management.
View reports: Allow viewing reports.
Manage campaigns: Allow campaign management.
Manage AI Agent: Allow AI Agent management, including knowledge, settings, tools and flows.
Manage agents: Allow team management.
REST API
REST API: Allow usage of REST API.
Admin
Access admin area: Required in order to access any admin area page.
Manage tags: Allow tag management from admin area.
Manage triggers: Allow trigger management from admin area.
Manage views: Allow view management from admin area.
Manage statuses: Allow status management from admin area.
Manage attributes: Allow attribute management from admin area.
Role management: Allow role management from admin area.
Manage localizations: Allow localization management from admin area.
Manage files: Allow file management from admin area.
Manage pages: Allow custom page management from admin area.
Manage settings: Allow settings management from admin area.
Appearance editor: Allows access to appearance editor.
Super admin: Gives full permissions.
Best Practices
Change one major setting at a time and verify the result.
Keep admin-only settings limited to trusted users.
Revisit settings after product, policy, or brand changes.