
This guide helps your team get more value from TurboHelp's Customers tools. Use it to understand the feature, configure it correctly, and know what to check before relying on it in your daily support workflow.
At a Glance
Use customer tools to understand who you are helping and what history they already have with your team.
Keep customer records clean so agents can respond with context instead of asking repeat questions.
Use proactive conversations and account actions carefully, especially for sensitive customer data.
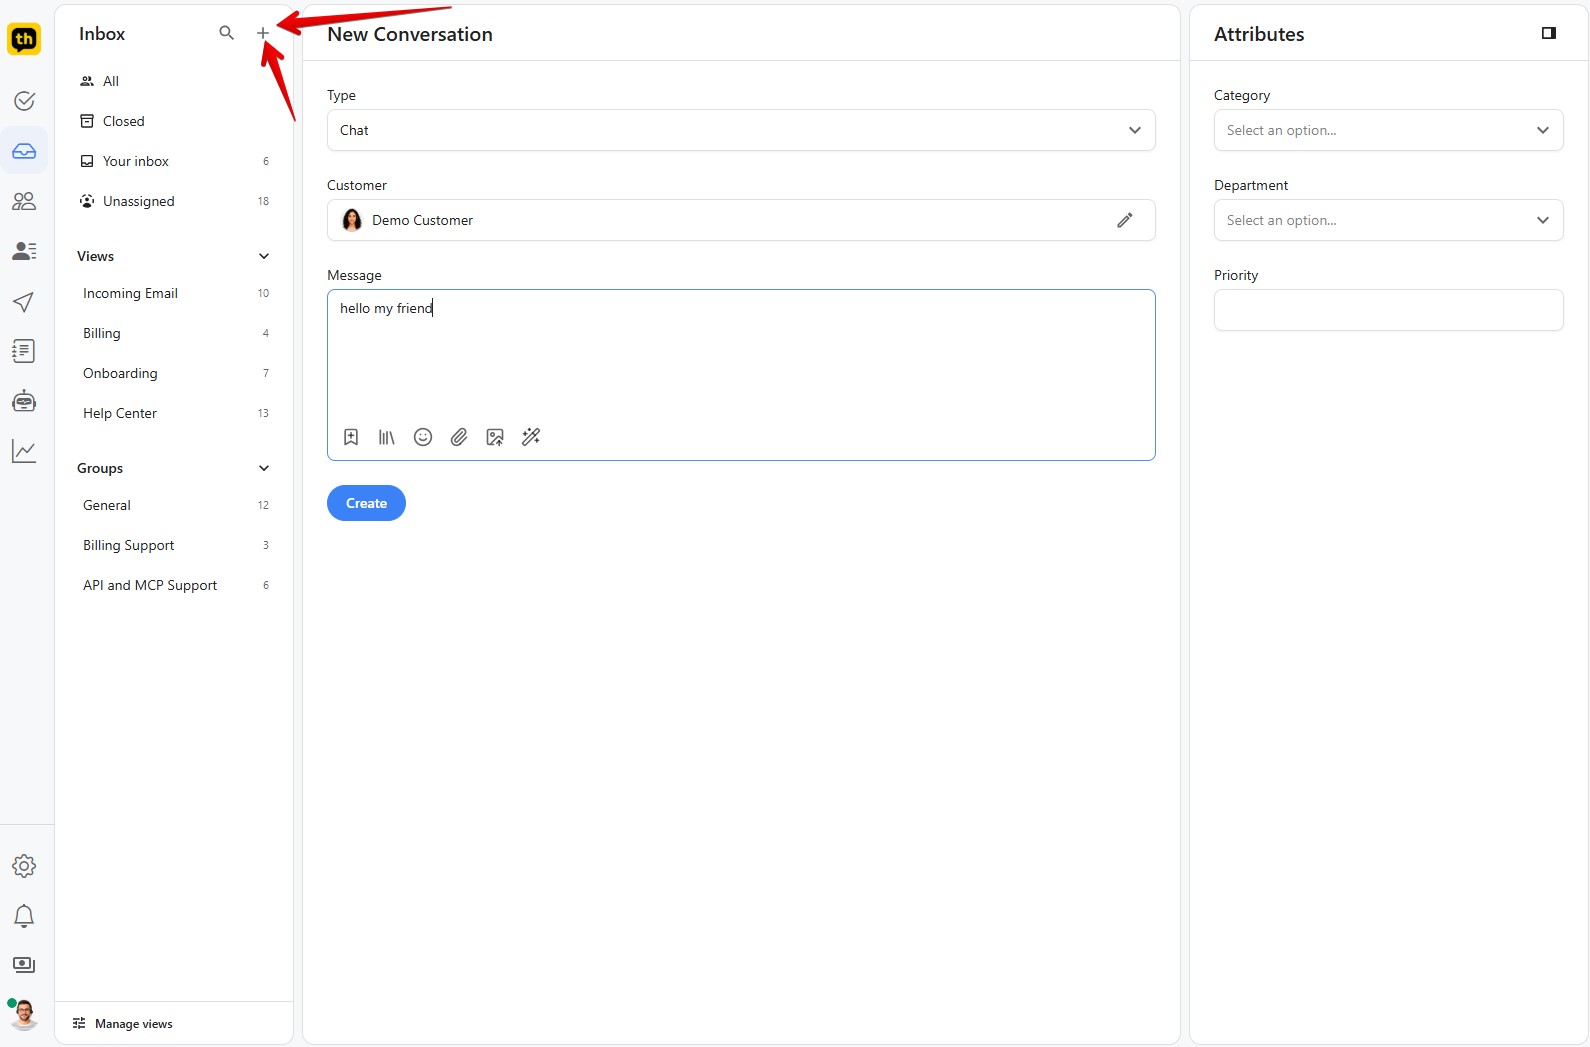
There are times when you need to proactively reach out to a customer instead of waiting for them to contact you. The New Conversation page in TurboHelp allows agents to easily create a new ticket or start a chat with a user directly from the agent dashboard.
This guide will walk you through the different options on this page.
Conversation Details
This is the main area where you will compose your message and define its core properties.
Type
The first step is to choose the type of conversation you want to start.
Ticket: Select this to create a standard ticket. This will send an email to the customer and will be visible in ticket portal in help center.
Chat: Choose this to initiate a real-time conversation with customer via LiveChat widget. This will open a conversation view in the chat widget, if user is currently online and notify via email otherwise.
Customer
Select the user you wish to contact. You can search for an existing customer by name or email.
Status (Ticket Only)
This dropdown tracks the current state of the ticket. By default, a new conversation will have the status set to Open, indicating it's active and requires attention.
Subject and Message
Subject (Ticket Only): Provide a clear and concise summary of the conversation's topic. A good subject line helps everyone quickly understand the purpose of the ticket (e.g., "Question about Order #4582").
Message: Write your main message here. The text editor includes a toolbar that allows you to format your text, add inline images, attach files, add hyperlinks, and use canned responses or other shortcuts.
Organizing with Attributes
The Attributes sidebar on the right side of the page helps you classify and organize the conversation for efficient routing and reporting. it will show built-in attributes as well as any custom conversation attributes that you have created.
➡️ To learn how to create and manage these, please see our dedicated article: Managing Custom Attributes.
Finalizing the Conversation
Once all the details are filled in and the correct attributes are assigned, simply click the blue Create button at the bottom. The conversation will be started, and the user will be notified. The ticket or chat will then appear in the appropriate inbox view for your team to manage.
Best Practices
Keep internal notes factual and useful for future agents.
Use tags and custom attributes consistently so customer lists remain searchable.
Be careful with suspension, impersonation, and deletion because these actions affect access and data.