
This guide helps your team get more value from TurboHelp's Live Chat tools. Use it to understand the feature, configure it correctly, and know what to check before relying on it in your daily support workflow.
At a Glance
Use the live chat widget to support visitors in real time without forcing them to leave your site.
Configure identity, routing, forms, and campaigns before driving production traffic to the widget.
Test the widget on desktop and mobile after every meaningful configuration change.
The Chat Page provides a dedicated, shareable link to a standalone page where customers can start a conversation with you. This is perfect for offering live chat support without needing to install the TurboHelp widget on your website. You can share this link anywhere—in emails, on social media, on invoices, and more.

Setting Up Your Chat Page
You can easily customize the welcome messages and logo that users see when they visit your direct chat page from Admin > Settings > Live Chat > chat page.
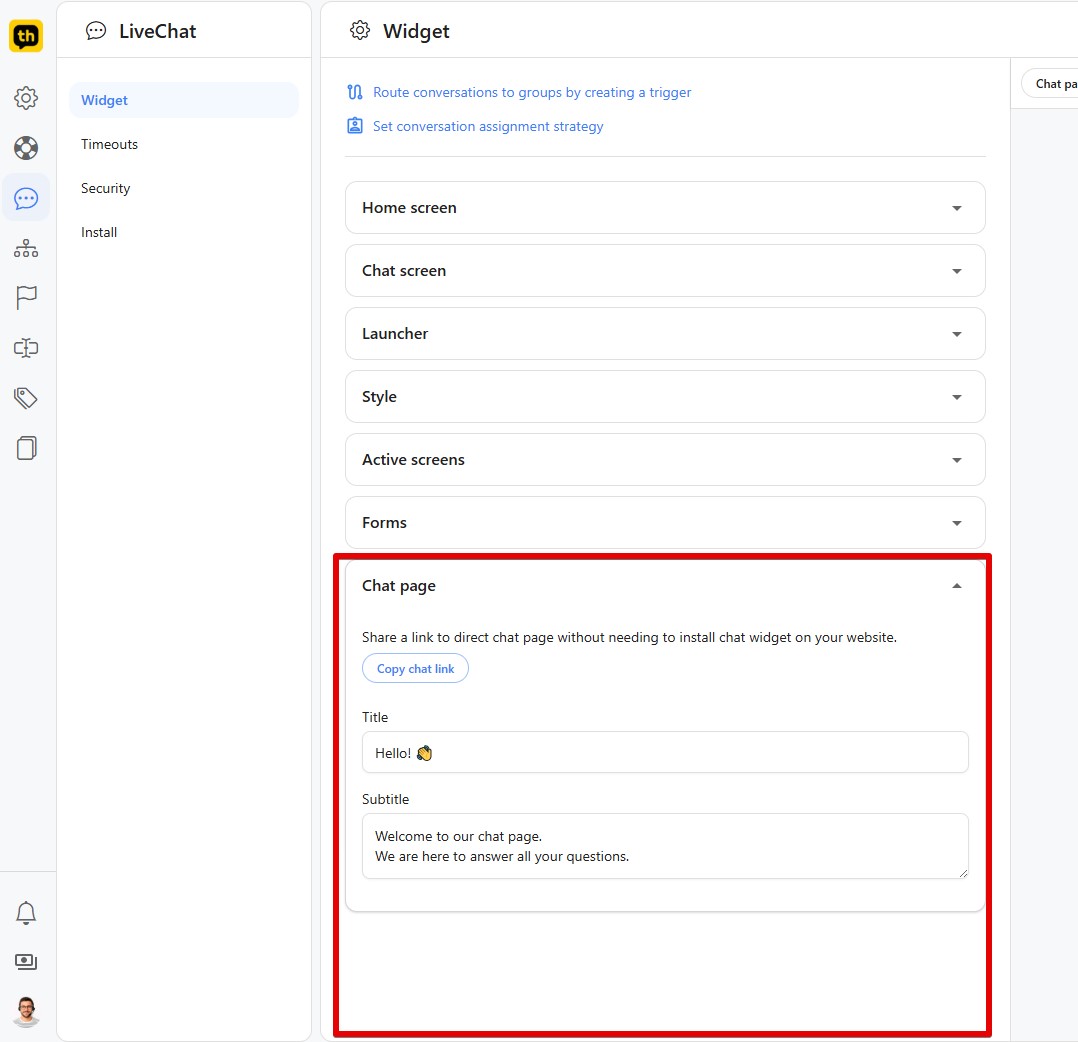
Sharing Your Chat Link
Once you've configured your page, sharing it is simple. Click the Copy chat link button to copy the unique URL to your clipboard. You can now paste this link anywhere you want to provide a direct line to your support team.
Great places to share your chat link include:
Your email signature
Your social media bio (Instagram, Twitter, Facebook)
Customer invoices and receipts
Your contact page or knowledge base
What Your Customer Sees
When a customer clicks your chat link, they are taken to a clean, focused page. On the left, they will see the custom Title and Subtitle you wrote. On the right, they will see the live chat window, ready for them to type their message and start a conversation with your team.
Best Practices
Keep the first widget experience short: ask only for the information agents truly need.
Verify identity for logged-in users before exposing account-specific conversation history.
Check widget behavior on key pages after changing themes, forms, or security rules.