
This guide helps your team get more value from TurboHelp's Conversations tools. Use it to understand the feature, configure it correctly, and know what to check before relying on it in your daily support workflow.
At a Glance
Use this feature to keep customer conversations organized and easy to act on.
Pair it with clear statuses, tags, and ownership rules so agents always know the next step.
Review the setup regularly as your support volume and team structure change.
Conversation statuses are essential for organizing your support workflow and keeping track of a conversation's progress. In TurboHelp, you can create custom statuses, decide what labels your agents and customers see, and categorize them to fit your team's process perfectly.
This article will guide you through viewing, creating, and managing your conversation statuses.
Navigating to the Statuses Page
All conversation status management is done from the Statuses page in admin area.
Here you will see a list of all current statuses, along with their labels, category, and whether they are active.
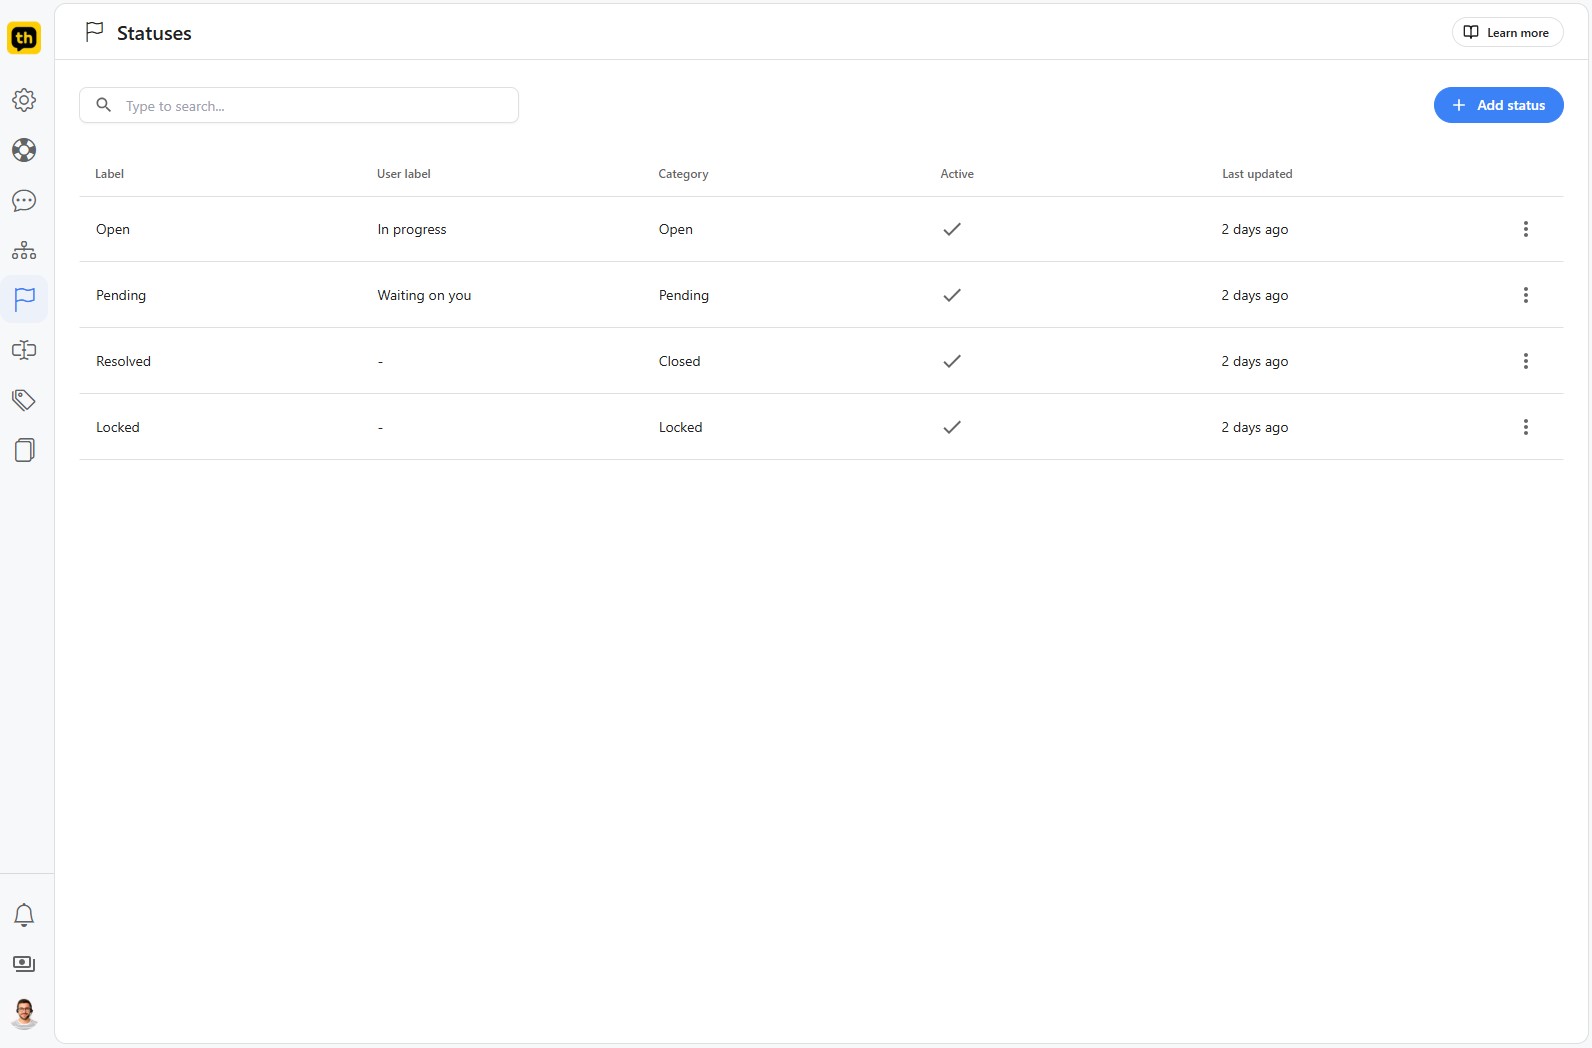
Understanding Status Components
Each status in TurboHelp has three key components:
Agent Label: This is the internal name for the status. It's the label your support agents will see and use within the helpdesk interface. In the statuses list, this is shown in the Label column.
Customer Label: This is the public-facing label your customers will see. This allows you to use internal terminology for your agents (e.g., "Pending - Tier 3") while showing something more user-friendly to the customer (e.g., "Our team is looking into it"). This is shown in the User Label column.
Tip: If the Customer Label is left blank, the Agent Label will be shown to customers by default.
Category: This is the system category that the status belongs to. Categories determine the core behavior of the statuses within them. There are four categories:
Open: For active conversations that are new or require attention from your team.
Pending: For conversations that are awaiting a response from the customer or a third party.
Closed: For conversations that have been resolved.
Locked: For conversations that are permanently closed and cannot be reopened, such as spam.
Creating a New Status
You can add new statuses to customize your workflow.
From the Statuses page, click the + Add status button in the top-right corner.
In the dialog box that appears, fill in the details:
Enter an Agent label.
Optionally, enter a Customer label.
Select a Category from the dropdown menu.
Click the Save button (or equivalent) to add the new status.
Editing an Existing Status
You can modify existing statuses at any time.
On the Statuses page, find the status you wish to change.
Click the three-dot menu (
...) on the right side of the status row.Select Edit from the menu.
In the Update status dialog, you can change the Agent label, Customer label, or Category.
Click the Update button to save your changes.
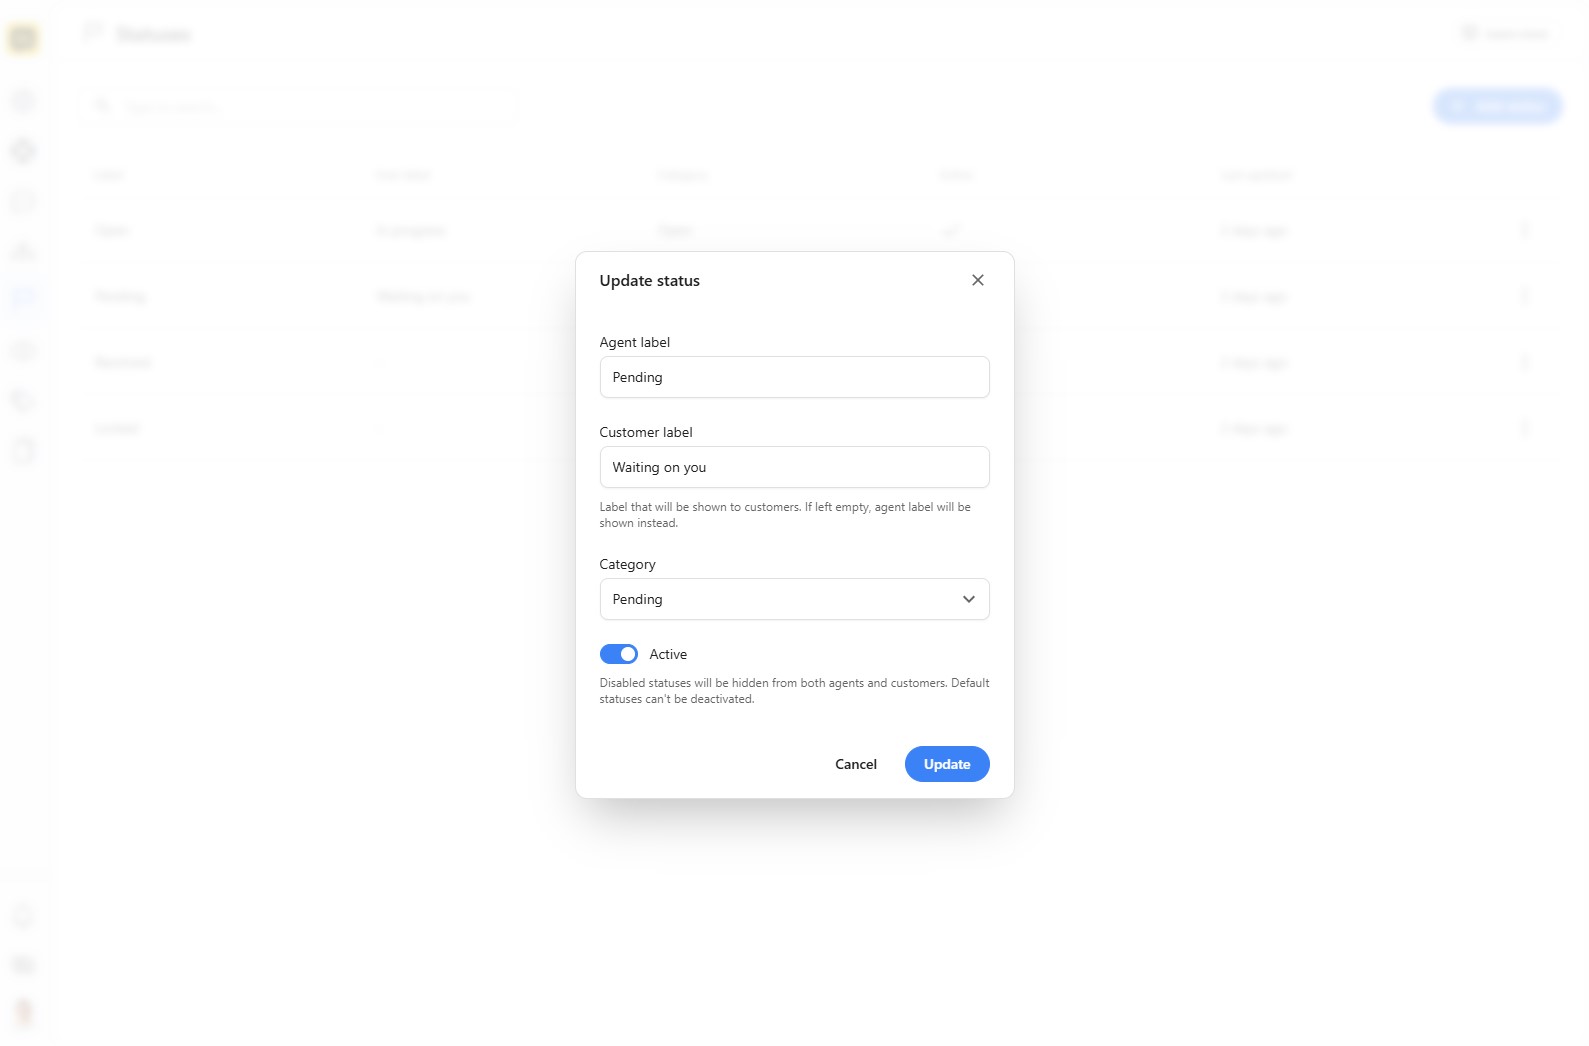
Deactivating and Activating a Status
If a status is no longer needed but you want to preserve it for historical conversations, you can deactivate it. A deactivated status cannot be assigned to new or existing conversations but will remain on any conversations it was previously assigned to.
To deactivate a status:
Find the status on the Statuses page.
Click the three-dot menu and select Deactivate.
The checkmark in the Active column will disappear, and the status will no longer be available for use.
To reactivate a status:
Find the inactive status on the Statuses page.
Click the three-dot menu and select Activate. The status will become available for use again.
Deleting a Status
Warning: This action is permanent and cannot be undone. You generally cannot delete default system statuses or any status that is currently assigned to conversations. Consider deactivating a status instead.
To delete a status:
Find the status on the Statuses page.
Click the three-dot menu and select Delete.
A confirmation prompt will appear. Confirm the action to permanently delete the status.
Best Practices
Name views, statuses, attributes, and saved replies in plain language your whole team understands.
Avoid creating too many overlapping filters; fewer, sharper workflows are easier to maintain.
Audit old conversations and stale views on a regular schedule.