
This guide helps your team get more value from TurboHelp's Settings tools. Use it to understand the feature, configure it correctly, and know what to check before relying on it in your daily support workflow.
At a Glance
Use settings to shape TurboHelp around your team's support process, brand, and security needs.
Document meaningful changes so admins can understand why each option was configured.
Test customer-facing changes in a staging or low-risk environment when possible.
This article will guide you through the Authentication Settings page in the admin area. This page allows you to control how users register, log in, and what social login options are available on your site.
You can find the authentication settings by navigating to Admin > Settings > Authentication page.
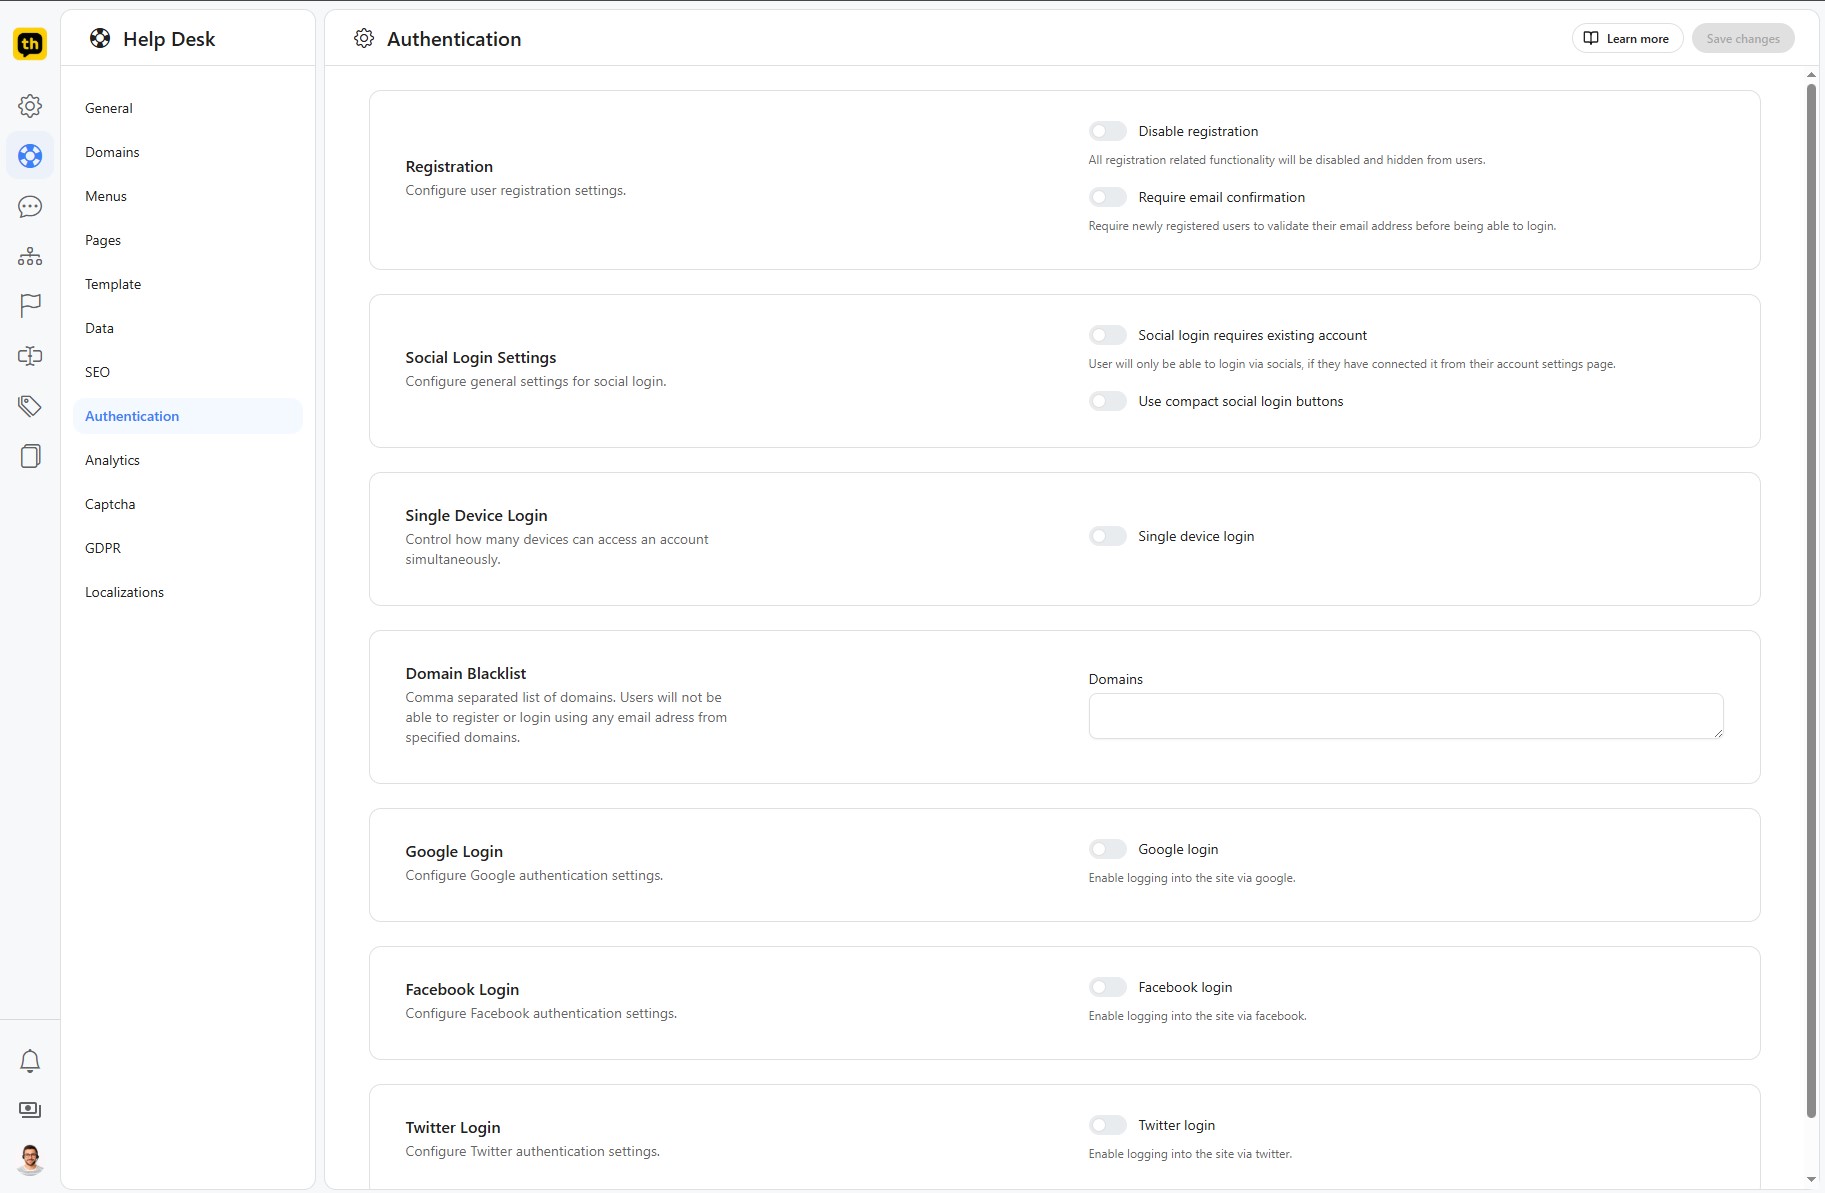
Registration
This section controls the self-registration process for your users.
Disable registration: Check this box if you want to prevent new users from creating accounts themselves. All registration-related functionality will be disabled and hidden.
Require email confirmation: When this option is enabled, new users must enter a secret code from a confirmation email to verify their email address before they can log in. This is a recommended security measure to prevent fake registrations.
Social Login Settings
Configure the general behavior for all social login options here.
Social login requires existing account: Enable this if you only want users who already created an account on your site manually to be able to log in via social providers. They will need to connect their social accounts from their account settings page first.
Use compact social login buttons: Check this option to use smaller, more compact versions of the social login buttons on your login and registration pages.
Single Device Login
This feature enhances security by controlling simultaneous access to a single account.
Single device login: When enabled, this setting restricts users to being logged in on only one device at a time. If they log in on a new device, they will be automatically logged out from the previous one.
Domain Blacklist
You can prevent users with email addresses from specific domains from registering on your site.
Domains: Enter a comma-separated list of domains you want to block (e.g.,
example.com, mailinator.com). Users with email addresses from these domains will not be able to create an account.
Third-Party Login Configuration
You can allow users to log in using their Google, Facebook, or Twitter accounts. To enable these, you will need to obtain API credentials (like Client ID and Client Secret) from the respective developer platforms.
Tip: See Configuring Social Login article for detailed instructions on how to set these up.
Google Login
Google login: Toggle this on to enable the "Log in with Google" option.
Google client ID: Enter the Client ID you obtained from the Google API Console.
Google client secret: Enter the Client Secret from your Google API Console.
Facebook Login
Facebook login: Toggle this on to allow users to log in with their Facebook accounts. You will need to configure your app settings in the Facebook for Developers portal.
Twitter Login
Twitter login: Toggle this on to enable the "Log in with Twitter" option. You will need to provide your API keys from the Twitter Developer Platform.
After making any changes on this page, remember to click the Save Changes button at the top right to apply them.
Best Practices
Change one major setting at a time and verify the result.
Keep admin-only settings limited to trusted users.
Revisit settings after product, policy, or brand changes.