
This guide helps your team get more value from TurboHelp's Settings tools. Use it to understand the feature, configure it correctly, and know what to check before relying on it in your daily support workflow.
At a Glance
Use settings to shape TurboHelp around your team's support process, brand, and security needs.
Document meaningful changes so admins can understand why each option was configured.
Test customer-facing changes in a staging or low-risk environment when possible.
The GDPR settings page in your TurboHelp admin area provides essential tools to help you comply with the General Data Protection Regulation (GDPR). This guide will walk you through configuring the cookie consent notice and setting up registration policies for your users.
Accessing GDPR Settings
To get started, navigate to the GDPR configuration page:
Log in to your TurboHelp admin area.
From the left-hand sidebar, click on Settings.
In the settings menu, select GDPR.
You will now see the main GDPR settings page, divided into two sections: Cookie Notice and Registration Policies.
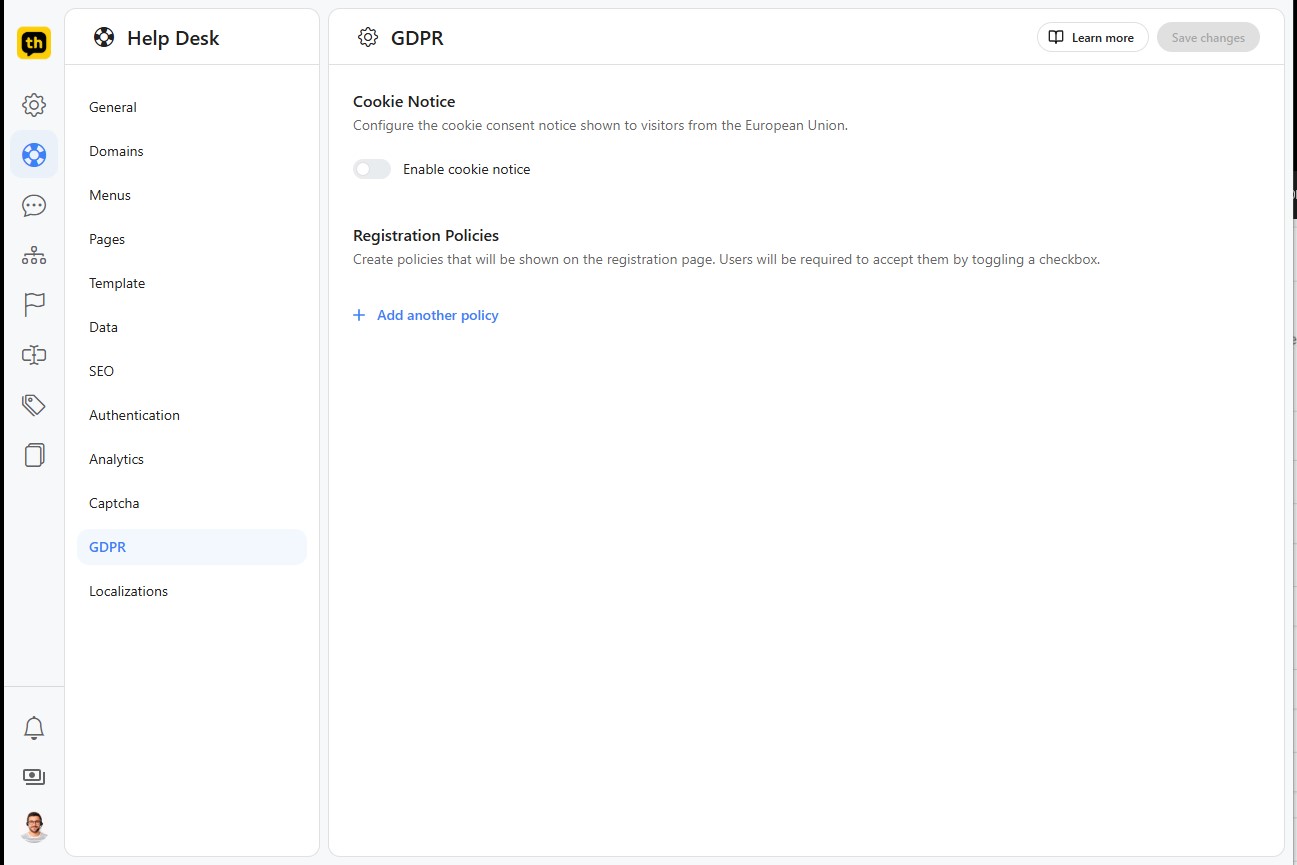
Cookie Notice
This section allows you to configure the cookie consent banner that is shown to visitors from the European Union.
1. Enable cookie notice
Toggle this switch on to activate and display the cookie notice on your help center. If it's off, no notice will be shown.
2. Information button (Optional)
This configures the link or button on the cookie notice that directs users to your detailed policy. You can link to an external URL, custom page created in TurboHelp or one of the urls within TurboHelp itself.
3. Cookie notice position
Select the position where the cookie banner will appear on the screen.
Registration Policies
This section allows you to create and manage policies that users must accept before they can complete the registration process. This is typically used for your Terms of Service, Privacy Policy, or other agreements.
To add a new policy, click the + Add another policy link. An "Add policy" window will appear. You have three types of links you can create for a policy:
Type 1: Link
This option is for linking to an external URL. This is useful if your policy is hosted on your main company website or another location outside of TurboHelp.
Adding a policy with a custom link.
Label: The text that will appear next to the checkbox, describing the policy (e.g., "I agree to the Terms of Service").
URL: The full URL of the policy page.
Type 2: Route
This option allows you to link to an internal page within your TurboHelp application, such as your contact page or a default application page.
Adding a policy using an internal route.
Select Route from the dropdown menu.
You can then search for and select an existing application path (e.g.,
/contact,/register).
Type 3: Custom Page
This option allows you to link to a custom page that you have created from admin area in TurboHelp.
Adding a policy using a custom page.
Select Custom Page from the dropdown menu.
Search for and select the title of the custom page you want to link to (e.g., "Example Privacy Policy").
Once you have added all the necessary registration policies, they will appear as required checkboxes on your user registration form.
Saving Your Changes
After you have configured the cookie notice and registration policies to your liking, make sure to click the Save changes button at the top-right corner of the page to apply your settings.
Best Practices
Change one major setting at a time and verify the result.
Keep admin-only settings limited to trusted users.
Revisit settings after product, policy, or brand changes.